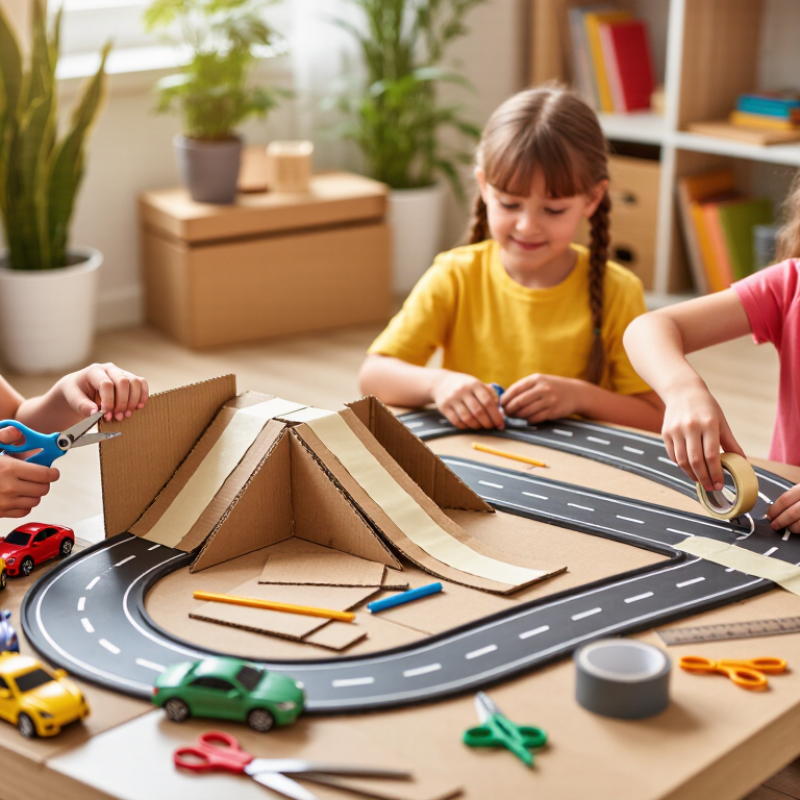
A cardboard car track can turn an ordinary box into a small workshop for testing speed, slope, and sturdy design. This guide introduces how to build a toy car track out of cardboard, using simple materials such as corrugated boxes, masking tape, a ruler, and child-safe scissors. The aim is not a perfect miniature racetrack. It is a track that stays upright, lets toy cars roll smoothly, and can be adjusted when a bend or ramp fails.
Child-development educator Fred Rogers said, “Play is often talked about as if it were a relief from serious learning. But for children, play is serious learning.” That idea fits this project: children can explore gravity and problem-solving while building with their hands. A folded-cardboard sidewall, for example, can keep a car from slipping off a curve. A strip of tape can steady a ramp, though too much may create a bumpy surface. Small details matter.
The outline will cover choosing a stable base, measuring track lanes, cutting and joining cardboard, shaping curves, and testing the finished route. It will also point out common weak spots, including sagging ramps and loose joints. Expect a few revisions. The first attempt may wobble, and that is useful feedback. Keep the track low, smooth sharp edges, and supervise young builders when cutting. The result should invite another test, not just look good in a photo.
Choose Corrugated Board: E-Flute Is ~1.5 mm; B-Flute ~3 mm
For a cardboard toy car track, flute thickness affects both the surface and the structure beneath it. The Fibre Box Association’s industry guide, Corrugated Packaging 101, lists E-flute at about 1/16 inch and B-flute at about 1/8 inch. That converts to roughly 1.5 mm and 3 mm. These are typical profiles, not guaranteed measurements for every sheet.
E-flute makes a thinner deck, which can help small cars roll over a smoother-looking surface. Its compact profile is useful for tight bends and raised track edges. B-flute is about twice as thick, giving the board more depth for ramps and supports. But thicker is not automatically better. A poorly braced B-flute ramp can still sag, especially across a wide span.
Cut a short sample before building the full track. Place a ruler across two supports, press gently in the middle, then roll a toy car over it. Watch for flex and rough joints. I would treat the flute figures as a starting point, since sheet quality and direction also affect stiffness. The industry guide’s dimensions describe flute profiles; they do not predict how a finished homemade track will behave.
Measure the Toy Car and Set Track Width at 2–3× Its Body Width
Measure the toy car at its widest point, including wheels or fenders. If the body is 4 cm wide, start with a track 8–12 cm wide. That 2–3× range is a practical rule of thumb, not a formal engineering standard. The narrower end helps keep a small car on a straight run; the wider end gives more room through bends. Mark both track edges with a ruler before cutting. A strip of cardboard can serve as a test lane. Roll the car along it and check whether the wheels scrape the sides. Small cars can drift more than expected.
Tips: Leave a little extra width at corners, and fold low side walls from the same sheet. Keep it simple. Use smooth tape joins so wheels do not catch. Test before taping permanently.
For sturdier results, orient corrugation consistently and reinforce joints underneath with folded cardboard tabs. The U.S. EPA’s 2018 Facts and Figures report estimated that 96.5% of corrugated boxes were recycled in the United States. That figure concerns recycling, not track performance, but it supports cardboard as a widely recovered material for a reusable craft. Recheck the width after adding walls; they can narrow the lane. My first measurements may still need adjustment, especially if the car has unusually wide wheels.
How to Build a Cardboard Toy Car Track
Measure the toy car’s body width, then make the track 2–3 times as wide. The example widths below are illustrative; recommended track widths are calculated from the stated ratio.
Build a 5°–10° Ramp and Reinforce Long Spans Every 20–30 cm
A sturdy cardboard toy car track starts with a gentle ramp. Raise one end by about 5° to 10°; a small angle helps cars roll without racing off the edge. For a 60 cm run, a rise of roughly 5–10 cm gives a useful starting point. Adjust it after testing your car. Cardboard bends easily, especially near a raised joint. Add folded strips beneath the ramp, then tape the seams firmly. Keep the track surface smooth. Even a small ridge can slow lightweight wheels.
Tips: Mark support points every 20–30 cm along long, flat spans. Glue or tape folded cardboard beams underneath each point, with the folds facing down for stiffness. Let adhesive dry before testing. If the track sags, add another support rather than simply adding more tape.
Test with one car at a time. Watch where it slows, wobbles, or leaves the track. Low side walls can help guide it through turns, but keep them even and securely attached. A ruler and a stack of books make a simple way to set the ramp height. My first cardboard version often needs another brace; that is normal, and a little trial and error reveals weak spots quickly.
China Top Guide: How to Build a Cardboard Toy Car Track — Build a 5°–10° Ramp and Reinforce Long Spans Every 20–30 cm
| Track Feature |
Suggested Dimension |
Build Guidance |
Practical Check |
| Track surface |
40–60 cm wide; about 60–120 cm long per section |
Use a flat sheet of corrugated cardboard. Keep the corrugation direction consistent where possible, and tape adjoining sections smoothly. |
Run a toy car over each join by hand; it should not catch on an exposed edge. |
| Ramp angle |
5°–10° |
For a 60 cm horizontal run, raise the end approximately 5–11 cm. For an 80 cm run, raise it approximately 7–14 cm. |
Measure the angle or compare the rise with the horizontal run. Secure the raised end so it cannot slide. |
| Side rails |
About 3–5 cm high |
Fold cardboard strips into an L-shaped profile and attach one along each side. Keep the inside edges straight and free of tape wrinkles. |
Check that the rails are higher than the car’s wheels and do not narrow the track unexpectedly. |
| Long-span supports |
Place supports every 20–30 cm |
Add folded triangular braces, box-shaped posts, or doubled cardboard ribs beneath unsupported sections. Shorter spacing can help where the track flexes. |
Press gently at the center of each span; add a support if the surface sags or shifts noticeably. |
| Support footprint |
About 5–8 cm wide at the base |
Use broad folded bases or crosspieces to spread the load. Tape supports to both the track underside and a stable base when appropriate. |
Confirm the support stands upright and does not tip when the car reaches the section. |
| Curve width |
Keep the running surface at least as wide as the straight sections |
Make curves gradual rather than sharply pinched. Reinforce the outside edge with a folded strip if the cardboard tends to flatten. |
Test the curve with the intended toy car at a slow roll before adding decoration. |
| Track joints |
Overlap adjoining pieces by about 3–5 cm |
Join sections from underneath where possible, then cover any exposed top edge with smooth tape. Avoid raised tape ridges in the car’s path. |
Check the joint from the direction the car travels; the leading edge should not face upward. |
| Stability and surface |
Use a level, clear work surface |
Keep the track away from table edges and heavy foot traffic. Use only lightweight toy cars suitable for the track’s size. |
Do a slow test run and inspect for loose tape, bending supports, or sharp cardboard edges. |
Planning note: Ramp rise is approximate and depends on the horizontal run. For a straight ramp, rise = run × tan(angle). Dimensions are practical starting points; adjust them to suit the cardboard thickness, toy car, and available space.
Cut and Join the Track, Keeping Sidewalls Above Wheel Height
China Top Guide How to Build a Cardboard Toy Car Track
Measure the car before cutting. Set it on the cardboard and mark a lane with room for the wheels to turn. Cut straight sections with a ruler and craft knife, using adult supervision. For each sidewall, start with a height slightly greater than the wheel diameter. This helps keep the car on the track without letting the wall scrape its body. Fold the wall along the corrugation, then join sections with short tabs and tape underneath. My first join was crooked. It still worked, but the car drifted at the seam.
Check every connection with your fingertips. Smooth rough edges, and keep tape away from the driving surface. The U.S. EPA’s 2018 Advancing Sustainable Materials Management report estimated that 32.1 million of 33.3 million tons of corrugated boxes were recycled in the United States. Reusing a clean box gives the material another practical purpose, though worn or damp cardboard may bend under pressure. Test the track slowly. Watch the wheels at bends: if they touch a sidewall, widen the lane or adjust the curve. Keep walls above the tops of the wheels, but leave enough clearance for the car to roll freely. A small gap can be hard to judge by eye; a short test run often reveals what needs fixing.
Test 10 Runs and Check Small Parts Against ASTM F963’s 31.7 mm Cylinder
Build the cardboard track on a flat table, with folded sidewalls and smooth, taped joints. Roll the same toy car down it ten times, resetting it at the same starting mark each run. Watch for crushed edges, loose wheels, and scraps that collect near the finish. Small failures matter.
After the tenth run, inspect every detached piece. ASTM F963 uses a small-parts cylinder with an opening about 31.7 mm wide; use a suitable cylinder to screen loose parts, following the standard’s testing instructions. If a piece fits completely inside, keep it away from young children and seek qualified guidance. A home check cannot establish compliance, and the intended age group affects safety requirements.
Tips: Keep a simple run log: “run 1, wheel loose,” for example. Check again after rebuilding; tape can hide a weak seam. Keep it simple. I missed one tiny cardboard tab on my first pass, so use bright lighting and inspect the floor around the track too.
Conclusion
Learning how to build a toy car track out of cardboard starts with choosing sturdy corrugated board. E-flute, about 1.5 mm thick, is suitable for lighter sections, while B-flute, about 3 mm thick, can provide extra support. Measure the toy car and make the track roughly two to three times as wide as its body. For a simple ramp, use a gentle 5°–10° slope, and reinforce long spans every 20–30 cm to help prevent sagging.
Cut the track pieces carefully and join them securely, keeping the sidewalls higher than the car’s wheels so it stays on course. Before play, test the track with 10 runs and check for loose joints, sharp edges, or small detachable pieces. For child safety, assess small parts using the 31.7 mm cylinder referenced in ASTM F963, and remove any pieces that could pose a choking hazard.

 Hoopla Toys