Choosing the right finish can decide whether a custom toy car looks factory-made or poorly repaired. The key question is not simply what color looks best. It is what kind of paint to use on custom toy cars when plastic, die-cast metal, rubber tires, and clear parts all behave differently.
This 2026 guide compares hobby acrylics, lacquer paints, enamels, and water-based polyurethane finishes. Each option has practical strengths. Acrylics usually offer easier cleanup and lower odor. Lacquers can produce a smoother, harder finish, but they demand careful ventilation and controlled application. Enamels may suit detailed metal parts, although their longer curing time can test patience. Small flaws matter. A thick coat can hide panel lines, while poor surface preparation can cause peeling around wheel arches.
Industry research supports this more careful approach. Grand View Research’s water-based coatings reports identify lower-emission formulations as a growing market direction. The European Coatings Journal also highlights adhesion, curing, and surface compatibility as essential performance factors. These findings apply beyond industrial parts. They matter when a tiny hood needs an even red finish.
Professional model builders commonly recommend cleaning, light sanding, priming, and thin coats. My own preference leans toward quality hobby acrylic for most beginner projects, but that is not universal. Lacquer may win on durability. Acrylic may win on control.
Test first.
Always check the paint manufacturer’s technical sheet and the toy’s material. For items handled by children, coating suitability and applicable toy-safety requirements need professional verification. A beautiful finish is not automatically a safe one.
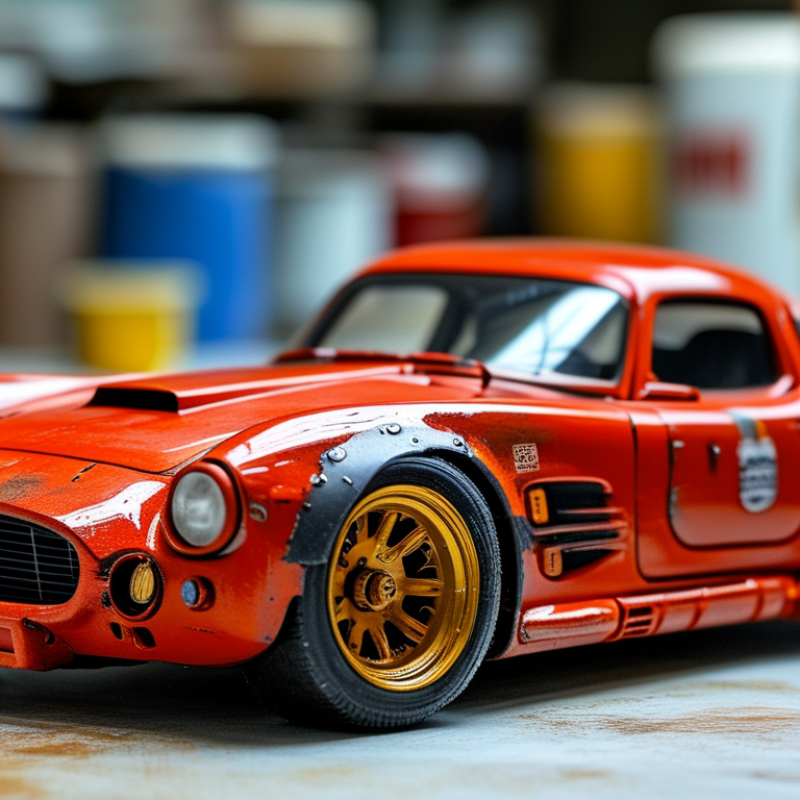
2026 Best Paint for Custom Toy Cars: What Kind to Use?
Choosing paint for a custom toy car starts with the body material. Plastic, metal, and resin react differently to solvents. Water-based acrylic paint is usually the most forgiving choice. It dries quickly, produces low odor, and works well for small details. Enamel paint creates a harder surface, but it needs more curing time. Lacquer can give a smooth finish, yet its strong solvents may damage some plastics. Always test the paint on an unseen area first.
In my workshop experience, preparation affects the result more than paint price. Wash the car body with mild soap, then let it dry completely. Light sanding helps paint grip smooth plastic. A thin primer coat can reveal scratches before color is added. Apply several light coats instead of one heavy layer. Heavy paint often hides panel lines and softens sharp edges. I once rushed a roof repaint, and the finish wrinkled overnight. That mistake reminded me to respect drying times.
Tips: Use separate brushes for fine lines and broad panels. Mix paint in small amounts, because leftovers may dry before the next session. Wear suitable protection and work with good ventilation. Keep the model away from dust while it cures. Gloss paint suits polished bodywork, while satin or matte paint can make interiors and tires look more realistic. Even careful work may need a small correction. That is normal.
| Paint Type | Typical Composition | Best Surface | Typical Touch-Dry Time | Durability | Finish Options | Key Advantages | Main Limitations | Recommended Use |
|---|---|---|---|---|---|---|---|---|
| Water-Based Acrylic | Fine-pigment acrylic resin dispersed in water | Primed plastic, resin, metal, and previously painted surfaces | Approximately 15–30 minutes, depending on coat thickness and humidity | Good | Matte, satin, gloss, metallic, and transparent | Low odor, easy color mixing, quick drying, and simple cleanup with water while wet | Thin coats are usually needed; unsealed paint may wear on frequently handled areas | Best all-purpose option for beginners, detail work, and indoor custom projects |
| Solvent-Based Enamel | Pigment carried in an oil-based or other organic-solvent binder | Metal and properly prepared hard plastic | Approximately 1–3 hours; full curing may take several days | Very Good | Gloss, satin, matte, and metallic | Strong film, smooth leveling, and good resistance to handling after full cure | Longer drying time, stronger odor, and cleanup requires the appropriate solvent | Suitable for durable body colors and toy cars that will be handled regularly |
| Acrylic Spray Paint | Fast-drying acrylic resin delivered as an aerosol coating | Large primed plastic or metal body panels | Approximately 10–30 minutes for a light coat | Good to Very Good | Gloss, satin, matte, and specialty finishes | Creates an even finish quickly and reduces visible brush marks on broad surfaces | Overspray can obscure small details; requires controlled ventilation and careful masking | Best for base coats, body shells, and smooth exterior panels |
| Lacquer | Fast-evaporating solvent with a lacquer-based resin | Compatible primed plastic or metal; test first on unknown plastics | Approximately 5–15 minutes for a light coat | Excellent | High-gloss, satin, matte, and metallic | Dries rapidly, levels well, and can produce a hard, polished surface | Strong solvent fumes may attack some plastics or earlier paint layers; requires careful ventilation | Best for experienced users seeking a polished automotive-style finish |
| Water-Based Polyurethane Paint | Polyurethane resin dispersed in water | Primed plastic, resin, wood, and metal | Approximately 30–60 minutes | Very Good | Satin, gloss, and matte | Forms a flexible, wear-resistant coating with lower odor than solvent-heavy products | May require longer curing before heavy handling; thick layers can remain soft | Useful for protective color coats and parts exposed to frequent touching |
| Paint Marker | Pigmented acrylic or solvent-based ink in a marker format | Primed plastic, metal, and sealed painted surfaces | Approximately 5–20 minutes, depending on the formula | Moderate to Good | Opaque, metallic, gloss, and fluorescent | Convenient for stripes, lettering, trim, headlights, and small accents | Stroke width is limited; ink flow can be uneven and may need a clear protective coat | Best for fine details and touch-ups rather than complete body coverage |
| Vinyl Dye or Flexible Coating | Pigment carried in a flexible coating designed to bond with flexible materials | Flexible vinyl, rubber-like components, and soft plastic parts | Approximately 15–30 minutes for a light coat | Good | Matte, satin, and gloss | Remains more flexible than many rigid paints and is less likely to crack on bendable parts | Color range may be more limited; compatibility testing is important on soft plastics | Best for flexible tires, seats, trim, and other bendable toy-car components |
| Clear Protective Coat | Transparent acrylic, polyurethane, enamel, or lacquer resin | Fully dried and compatible color coats | Approximately 15–60 minutes, depending on the formula | Improves Wear Resistance | Gloss, satin, and matte | Protects decals, color layers, and small details from handling and light abrasion | An incompatible clear coat can soften, wrinkle, or craze the underlying paint | Recommended as the final layer after testing compatibility on a hidden area |
Clean the body with mild soap and rinse it thoroughly. Let it dry completely before touching the surface. Fingerprints can weaken paint adhesion.
Thin layers reduce runs and protect small details around grilles, doors, and wheel arches. Apply three or four light coats. More paint is not always better.
Use a fine synthetic brush or controlled airbrush. Keep each pass moving in one direction. A wet coat should look satin, not pooled.
Follow the paint’s drying guidance and wait until the surface is no longer soft or tacky. Adding paint too soon can cause wrinkles and uneven color.
Work in a clean area and use a covered drying box. Inspect the body under angled light after curing. Tiny particles may still appear.
Let the paint cure fully before making corrections. Gently smooth rough spots, then remove dust carefully. I sometimes miss small flaws at first.
Wait until the paint has cured fully, even if it feels dry. Some acrylic layers may need several days to harden internally. I once sealed too early.
Test the sealer on a painted spoon or spare panel first. Apply light coats from about 20 centimeters away. Heavy coats can hide sharp edges and panel lines.
Handle it by the underside, preferably with clean cotton gloves. Dust it with a soft, dry brush. Keep it in a dry display case away from heat and windows.
Do not soak the model or use strong household cleaners. Avoid touching soft clear coat. A thinner finish often looks better, though I sometimes add one coat too many.
Creating a custom toy car starts with choosing the right paint for the surface and desired finish. The key question is what kind of paint to use on custom toy cars: a water-based acrylic paint is often a practical option because it dries relatively quickly, offers good color variety, and is easy to control with brushes or an airbrush. Before painting, clean the toy thoroughly, remove grease and dust, and lightly smooth the surface so the paint can adhere evenly. Applying a suitable primer can also help create a more consistent base.
For the best results, use fine brushes for small details and an airbrush for smooth, broad coverage. Apply several thin, even layers instead of one thick coat, allowing each layer to dry fully before continuing. Once the design is complete, add a clear protective sealer to improve durability and reduce scratches. Store the finished toy in a clean, dry place and handle it carefully to preserve its colors and details.

 Hoopla Toys